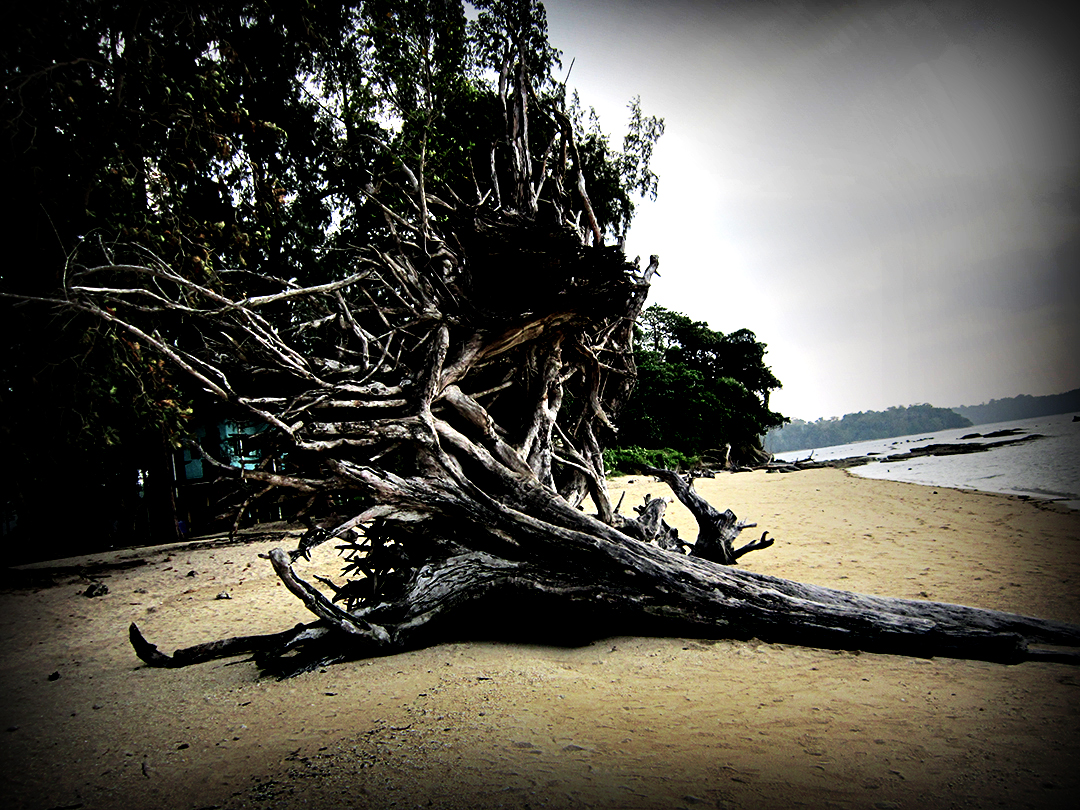
hello everyone this is NRG , today i'm gonna teach u guyz how to a lomo - like effect using photoshop . so first , lets open up photoshop and open a nice image . i'll be using this one :-
so let's do this step-by-step :-
1. select the lasso tool , and with a feather value of 60 / 70 / 80 / 90 pixels , create a selection around
the main subject , in my case , the tree .
2. go to select -> inverse or press ctrl+shift+i to select inverse .
3. create a new layer (ctrl+shift+n or layer -> new -> layer) and fill the inverse selection with black .
4. set the opacity of this layer to 30 / 35 / 40 % , whatever u like . (30 % works for me) . to change
opacity slide the opacity slider on top of the layers panel (press F7 to bring it up) .
5. select the background layer , and create a new curves layer ( click 4th icon on the bottom of layers
panel and select curves , or go to layer -> new adjustment layer -> curves) .
6. set a graph like this one :-
the colors will become a little bit changed .
7. now go to layer -> flatten image
8. create a new layer , fill it with black . set the blend mode as "hue" and opacity to 30 / 35 / 40 % . u
can set the blend mode using the drop - down list beside the opacity slider .
9. layer -> flatten image .
10. take the rectangular marquee tool . set the feather value at 1/12 of the image width . for example ,
if ur image is 1080 pixels wide , then feather value should be 90 px . u can see the image size by
going to image -> image size . select the whole of ur image using the marquee tool (do not use
ctrl + a) .
11. select inverse by going to select -> inverse .
12. create a new layer , and fill the inverse selection with black . set the blend mode of this layer to
overlay .
13. duplicate the previous layer . (layer -> duplicate layer)
14. flatten the image . (layer -> flatten image)
15 . now comes the good part . go to filter -> sharpen -> unsharp mask .
amount = < 40% , I used 24 %
radius = >50 pixels , I used 96 pixels
threshold = 0 levels .
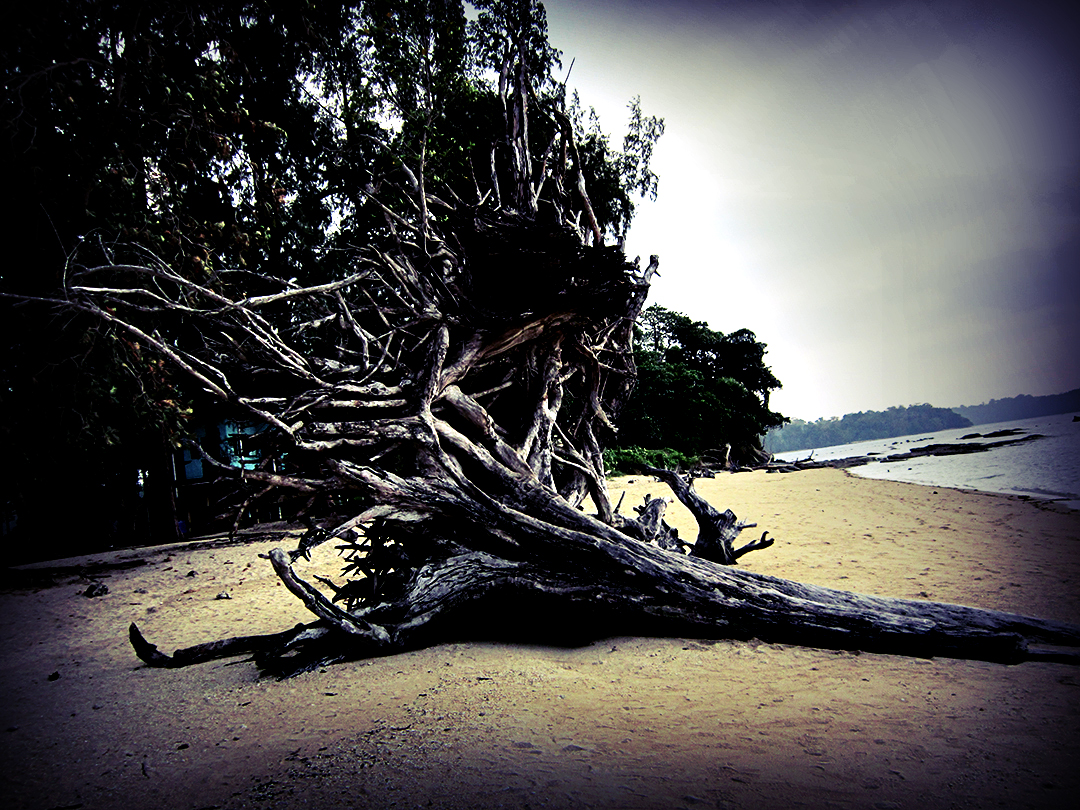
now u have a nice and sharp image , with vignette effect around the edges . this is what my
image looks like at this stage :-
now at this stage , u have two choices . u can either leave it at here , or add a nice purple cast over ur image. i'm gonna show u how to do the purple cast , and what it looks like .
16. create a new curves layer . (i have explained earlier how to make it)
select the red channel from the drop down list , and set the curve like this :-
select the green channel , and set the curve like this :-
now select the blue channel , and set the curve like this :-
so now my picture looks like this :-
 |
| my photography at Andaman and Nicobar , India . |
so let's do this step-by-step :-
1. select the lasso tool , and with a feather value of 60 / 70 / 80 / 90 pixels , create a selection around
the main subject , in my case , the tree .
2. go to select -> inverse or press ctrl+shift+i to select inverse .
3. create a new layer (ctrl+shift+n or layer -> new -> layer) and fill the inverse selection with black .
4. set the opacity of this layer to 30 / 35 / 40 % , whatever u like . (30 % works for me) . to change
opacity slide the opacity slider on top of the layers panel (press F7 to bring it up) .
5. select the background layer , and create a new curves layer ( click 4th icon on the bottom of layers
panel and select curves , or go to layer -> new adjustment layer -> curves) .
6. set a graph like this one :-
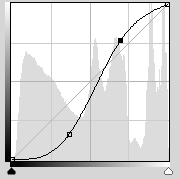 |
| lomo curve |
the colors will become a little bit changed .
7. now go to layer -> flatten image
8. create a new layer , fill it with black . set the blend mode as "hue" and opacity to 30 / 35 / 40 % . u
can set the blend mode using the drop - down list beside the opacity slider .
9. layer -> flatten image .
10. take the rectangular marquee tool . set the feather value at 1/12 of the image width . for example ,
if ur image is 1080 pixels wide , then feather value should be 90 px . u can see the image size by
going to image -> image size . select the whole of ur image using the marquee tool (do not use
ctrl + a) .
11. select inverse by going to select -> inverse .
12. create a new layer , and fill the inverse selection with black . set the blend mode of this layer to
overlay .
13. duplicate the previous layer . (layer -> duplicate layer)
14. flatten the image . (layer -> flatten image)
15 . now comes the good part . go to filter -> sharpen -> unsharp mask .
amount = < 40% , I used 24 %
radius = >50 pixels , I used 96 pixels
now u have a nice and sharp image , with vignette effect around the edges . this is what my
image looks like at this stage :-
 |
| almost done ! |
now at this stage , u have two choices . u can either leave it at here , or add a nice purple cast over ur image. i'm gonna show u how to do the purple cast , and what it looks like .
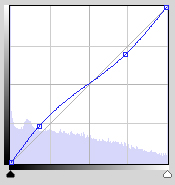
16. create a new curves layer . (i have explained earlier how to make it)
select the red channel from the drop down list , and set the curve like this :-
 |
| red channel curve |
select the green channel , and set the curve like this :-
 |
| green channel curve |
now select the blue channel , and set the curve like this :-
 |
| blue channel curve |
so now my picture looks like this :-
 | ||
| done ! |
This is some nice shit man.... cool work dude.... keep it up... :D
ReplyDeletethanks man !
Delete